Thursday, November 27, 2008

Cells 4

Grade 8, now that most of you have started your Cell projects and are beginning to paint, I want you to start thinking about what your final painting will look like. Here are some examples of Cell art to get you imagining the possibilities some more...


Madonna con Clon, Dr. Hunter O'Reilly


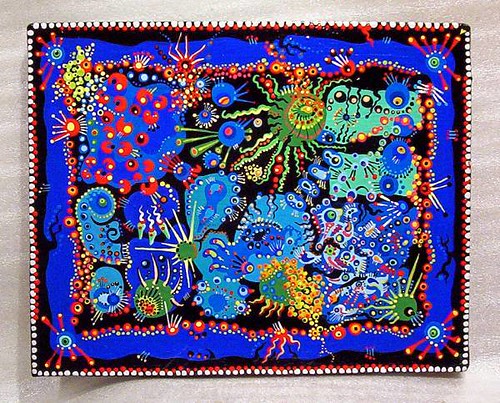
For homework, and to get you thinking about the Science of it all, visit these two links: Cell City and Cells Alive! Be ready in class next week to ANSWER QUESTIONS about the homework.

Remember that Mr. Young is going to be looking for the following information in your final painting:
  1. Name: The Cell is accurately named and sourced
  2. What is it: Kingdom of life the Cell belongs to is identified. Where in the multi cellular organism it is found is identified. If it is unicellular, where the organism lives.
  3. What does it do and how: Explanation of how it performs its function
  4. What makes it a Cell: 5 features common to all cells are identified
  5. What makes it unique: 5 features unique to this Kingdom of cells or this specialized cell

Monday, November 24, 2008

Collage Portrait


Grade 6 while you have been waiting for the projector to trace your Fingerprint, many of you have completed your first Collage Portrait. Collage Portrait, as we are calling it, is when you cut paper shapes to create the elements of a person's face and then glue them onto a background. Here are the basic steps:

To start with choose a picture from a magazine. Keep the size to about an A4 sheet of paper. It is best if your picture is a simple facial portrait.


Next take a sheet of tracing paper and place it over the picture that you chose. Then find shapes in the image. The hair can be one shape, the eyes, nose and mouth their own shapes. Try to simplify the image by making each element into a shape that you can easily cut from paper.


When the shapes are all cut, glue them carefully to the A4 size background. Leave a small space between each shape and watch how the background colour helps to add line to your composition.

Tip. Do not glue right to the edges, it keeps the portrait paper clean AND the edges create fun shadows in the Collage Portrait.

Sunday, November 23, 2008

Announcements Week 12 (24-30 Nov. 2008)

Grade 6
I am hoping that this will be the last week for you to trace your fingerprints in class. Many of you have also completed your Collage Portraits, which look amazing. We need to talk this week about what kind of images you will use for your Self-Portraits.

Grade 7
The Kapadokya Projects finally feel like they are shaping up and so I am looking forward to a productive week in the classroom with you.

Grade 8
About half of you have started on your "canvases" and the other half must begin this week, we will be talking in class about deadlines...

Thursday, November 20, 2008

Kapadokya Projects 2 - 703

We talked in class about getting your Development Sketchbooks into order and up-to-date, so here is your homework for Friday, November 21:

  • In your DevSkbks you will write 1 entry for the Kapadokya Project assignment, Paper Pigeon 1:

Paper Pigeon 1
  1. Write the date: 31 October 2008
  2. Write the Title: Paper Pigeon 1
  3. Write an explanation of the Project. In your Explanation include the following information - (a) As a Group you decided on completing 2 types of Pigeons, a Paper Pigeon and a Sewn Pigeon, (b) Explain that firstly you are completing a Paper Pigeon, (c) The idea came after Experimenting with different ideas for Sculptural type Pigeons and it became evident that you needed to work from a template (d) The idea of a template led us to Origami.
  4. Write a description of the class period when we experimented with different Origami patterns and then decided on the one that is shown in the post above. I will provide you with a copy of the instructions to put in your DevSkbks.
  5. Make a small Paper Pigeon to put into your DevSkbks.
  6. Describe how you have also decided to Paint and Sew onto the Paper Pigeons.

Wednesday, November 19, 2008

Kapadokya Projects 2 - 702

Christ Pantocrator in the Dark Church

We talked in class on Tuesday about getting your Development Sketchbooks into order and up-to-date, so here is your homework for Friday, November 21:

  • In your DevSkbks you will write 2 entries for the Kapadokya Project assignment, Ceiling Fresco 1 and Ceiling Fresco 2.

Ceiling Fresco 1
:
  1. Write the date: 31 October 2008
  2. Write the Title: Ceiling Fresco 1
  3. Write an explanation of the Project. In your Explanation include the following information - (a) As a Group you decided on a ceiling painting, (b) Murat chose the image of the Christ Pantocrator from the Dark Church, (c) The idea came from visiting the churches at the Göreme Open Air Museum, (d) The ceilings in the classroom are drop ceilings with tiles and so you had a ready made grid to work with.
  4. Draw and explain the Grid. In you explanation you should explain how the grid is numbered, who has been assigned which tile and the measurement of each square/tile. You should also give the overall measurement of the final ceiling fresco (240 cm).
  5. Sketch of the Fresco. This is a quick and dirty sketch of the picture at the top of this post. After you have completed the sketch you should note the Colours of the Fresco

Ceiling Fresco 2
  1. Write the date: 18 November 2008
  2. Write a title: Ceiling Fresco 2
  3. Write an Update of the Project. In your update include the following information: (a) Where the tiles for the project came from (b) Who made the grid version of the photograph (c) How you transferred the picture to the tile.
  4. Reflect on the Process. Write about some of the challenges for tracing the tiles and some of the solutions that you came up with.
  5. List the Tiles. Each tile has a number and an artist. Record the list in your DevSkbks.

The photos for each tile are now on Flickr you can click on the link OR you can click on the picture at the top of the post and it will take you to the tiles.

Sunday, November 16, 2008

Announcements Week 11 (17-23 Nov. 2008)

Grade 6
In class you are either tracing your Fingerprint OR working on the Collage Portrait. The Collage Portraits are beginning to look really good. The Fingerprints are also coming along and I am anxious to start painting with you.

Last week we did not go through the Development Sketchbook checklist that I gave to you, but we will this week, so make sure that you are ready to have your books checked by me on these days:

  1. 601 - Tuesday, Nov. 18
  2. 602 - Wednesday, Nov. 19
  3. 603 - Thursday, Nov. 20
Grade 7
The Kapadokya Projects are well established now and you need to record the process in your Dev. Skbks. We talked about this in class and agreed that at some point this week I would post a homework assignment for each group to write about their work. The assignment will be due for all the Grade 7 groups on Friday, Nov. 21.

Meanwhile, in class:
  1. 701 - Complete the transfer of your design onto the Grid Paper that I gave you so that you can proportion your work and plan realistically for the Collage Sketch of the Street Scene that you must also do this week.
  2. 702 - This week you start painting.
  3. 703 - You should have completed painting your Paper Pigeon and this week you will sew onto the paper for the final layer of detail.
Grade 8
Last week we spent a significant amount of time re-grouping to make sure that your Cell Research is recorded and clear in your Dev. Skbks. I am expecting to see everybody done with that portion of their work this week and all members of the class working on their final paintings.

Sunday, November 9, 2008

Announcements Week 10 (10-16 Nov. 2008)

If you are on Facebook, join the Art Group to get TetraBlink updates delivered to you as notifications. Click on the badge in the Announcements column and ask to "friend" the group.

Grade 6
Read the post: Fingerprint 2

In class you are either tracing your Fingerprint OR working on the Collage Portrait. I will be grading your Dev. SkBks. So make sure that the checklist that I gave to you is complete and that your books are in order

Grade 7
Read the post: Kapadokya Projects 1

Group 701 (Shadow Boxes) make time to meet outside of class in your groups and do the planning that you should have done to day in class please.


Grade 8
Final Grades on Cells 3 are this week - all of you should be starting on your "canvas" for your painting this week.

Saturday, November 8, 2008

Kapadokya Projects 1

Grade 7
The Kapadokya Projects are taking shape. We saw some good progress in developing ideas in the Fresco Group and the Pigeon Group.


7_01 Shadow Boxes
You know that I expect to see some real collaboration and progress this week. You have a lot of work to do to make up for the last two lessons where only Group 1. Skyline/Landscape were able to come together and be productive. The other two groups: Group 2. Göreme/Town/Churches and Group 3. Underground City have some serious research and brainstorming to do. If you do not get it together this week, we will have to re-group and seriously assess what to do.


7_02 Ceiling Painting/Fresco
The fresco quadrants are getting transferred in class using the projector. You have already completed half of the tiles and I think that this week you will complete the rest of them, that means that next week you will be able to start painting.

While waiting for the tiles to be transferred you have been assigned a Collage Portrait as a pre-cursor to your Self-Portrait that you will be completing after the Kapadokya Project is finished.


7_03 Pigeon House and Pigeons
This past week we made some great Paper Pigeons and many of you brought in a wealth of supplies for us to experiment with. As a group you have agreed to make a life-size Paper Pigeon first, embellish it by cutting feathers and adding details through sewing. Your second Pigeon is going to be a soft sculpture aka a Stuffed Pigeon. This week please we will concentrate on the Paper Pigeons.

Fingerprint 2


In class this week you completed a Contour Drawing of your Fingerprint in your Development Sketchbooks and then you chose a set of Complementary Colours (Red & Green, Blue & Orange, Yellow & Violet) and you tested how you might choose to paint your final fingerprint using those colours plus all the tints and shades.

This week I also fingerprinted each of you and scanned your prints so that we can project them onto the wall and you can trace a large copy for your final painting. The tracing takes time, and so we also started a Collage Portrait. While you are waiting for the projector you will work on various Creativity Challenges as well as the Collage Portrait. I will do a separate posting for the Collage Portrait when all of you have had a chance to see what it is about in class.

Grade 6
This week in class I will grade your Dev. SkBks. So make sure that the checklist that I gave to you is complete and that your books are in order.

Wednesday, November 5, 2008

Facebook for Art Class

Lacoste McDonagh's Facebook profile

As we know, checking Tetra Blink is not always a priority, for the Grade 8 in particular, and so, Zarina suggested that I create a Facebook Profile because you are all on Facebook most of the time anyway and that way you will get the notifications/updates on the blog delivered to you in the comfort of your own home.

What I have done:
I have created a profile as Lacoste McDonagh and then within that profile I have created a group called Tetra Blink - BUPS/BIS Middle School Art.

What you need to do:
Friend me (Lacoste McDonagh) so that I can then invite you to join the Tetra Blink - BUPS/BIS Middle School Art that is just for us. To friend me just click on the Facebook badge in this post or go to the badge in the sidebar under Announcements and click on that.

I think this should work, so... Thank you Z.

Sunday, November 2, 2008

Announcements Week 9 (02 - 09 Nov, 2008)

Grade 6
You are all working on your Fingerprint drawing in your Development Sketchbooks. This week you will identify your print and and start planning your painting.

Grade 7
The Kapadokya Projects are taking shape, It seems that this week you sorted out most of the logistics of your projects (except for the Pigeons...) and now it is time to start working on them for real.

7_01 Shadow Boxes
Friday's class was tough, those last two periods are tricky, it is hard to come in at the end of the day at the end of the week and be all full of energy and ideas. I appreciate how quickly you agreed on your project idea and I think it is going to be a really good one. This week you need to sketch out the design for the project, make a list of materials and assign who is going to work on which Shadow Box: 1. Skyline/Landscape, 2. Göreme/Town/Churches, 3. Underground City.

7_02 Ceiling Painting/Fresco
The fresco has been mapped and each of you have been assigned your section of the grid to paint. If you have forgotten, you need to speak to Murat. This week you will be tracing your quadrant onto the ceiling panel. As a class you need to talk about colours and make a final list of your colour palette.

7_03 Pigeon House and Pigeons
We agreed that the Pigeon experiment was pretty funny and quite a disaster in terms of making models of Pigeons. You know that as a group you need to collect lots of pictures for references AND decide on the best method for making your Pigeons. That needs to happen this week!

Grade 8
Most of the background research is completed. You should have a detailed profile of your cell and a good understanding of it. Your stories are ready for the paintings and you have completed the Sketch Painting in your Development Sketchbooks. This week all that work needs to translate into you starting the actual painting.

Saturday, November 1, 2008

Fingerprint 1


Grade 6 your are doing a Forensics unit in Science class and your next art project is going to be a large painting of one your own fingerprints. You will paint using only 2 complementary colours + the shades and tints of those colours.

In class we explored what a fingerprint is. Some of the words you used to define a fingerprint were: unique, pattern, identity, whorl, arch, loop, oil, trace, forensics, DNA, everybody has them and they are everywhere.

In your Development Sketchbooks you made a print of your Thumb and then attempted to draw a full page copy of it. While doing that you discovered just how much detail and information a fingerprint actually has in it and many of you complained that it was "too hard" or "too much", which made me laugh, because YES it is far more complicated than you first think and that is what is so cool about having fingerprints.

6th Grade Homework
In your Development Sketchbooks research the following vocabulary for fingerprints:

  1. Arch
  2. Loop
  3. Whorl
  4. Twinned Loop
  5. Composite.
For each word write a definition in your own words and draw an example fingerprint. The size of your drawings can be quite small but 3cm x 3cm should be the smallest. When writing your definitions just try to describe what you see in your own words, just like we did in class.

I have posted links in the links column under FINGERPRINTS, you will need to look at these to do your homework.